Quick Weave: The Ultimate Guide To Fast, Fabulous Hair Transformations
Are you dreaming of a dramatic hair transformation without the commitment of hours in a salon chair? Look no further than the quick weave. This innovative and increasingly popular hair extension technique offers a fast and stylish way to completely transform your look, providing instant length, volume, or a brand-new style. Whether you're a seasoned extension wearer or a curious beginner, understanding the ins and outs of quick weaves can unlock a world of versatile and stunning possibilities for your hair.
In a world where time is a precious commodity, the quick weave stands out as a true game-changer. It's a method that promises not just aesthetic appeal but also remarkable efficiency, allowing you to achieve salon-quality results in a fraction of the time typically required for traditional weaves. But what exactly makes a quick weave so "quick," and what do you need to know before diving into this exciting hair journey? This comprehensive guide will explore everything from its core definition and unparalleled benefits to essential installation tips, crucial maintenance practices, and safe removal techniques, ensuring your quick weave experience is both beautiful and healthy for your natural hair.
Table of Contents
- What Exactly is a Quick Weave?
- The Unmatched Benefits of Choosing a Quick Weave
- Navigating the Potential Drawbacks of Quick Weaves
- Essential Tools and Materials for Your Quick Weave Journey
- Step-by-Step: Mastering Quick Weave Installation for Healthy Hair
- Maintaining Your Quick Weave: Tips for Longevity and Luster
- Safe Quick Weave Removal: Protecting Your Natural Strands
- Unleashing Your Style: Popular Quick Weave Hairstyles
What Exactly is a Quick Weave?
At its core, a quick weave is a hair extension technique that has revolutionized the way many women approach their hairstyles. Unlike traditional sew-in weaves that involve intricate braiding and needle-and-thread stitching, this method simplifies the process significantly. **A quick weave is a style where extensions are glued to a protective wig cap before bonding it to your head.** This technique involves gluing hair wefts onto a protective cap placed directly on your head, which acts as a barrier between your natural hair and the adhesive. The hair used for a weave, whether quick or traditional, may be human or synthetic, and it's attached by way of bonding glue. The defining characteristic of a quick weave, as its name suggests, is its speed. While a traditional sew-in might take anywhere from three to six hours, installing a quick weave typically takes about one or two hours. This drastically reduced installation time is a major draw for those with busy schedules or anyone looking for a rapid style change. The process begins with preparing your natural hair, usually by braiding it down or molding it flat against your scalp. A protective wig cap is then placed over your prepped hair. Hair wefts, which are essentially tracks of hair, are then cut and carefully glued onto this cap, layer by layer, until the desired fullness and style are achieved. Once the glue dries, the entire cap, now adorned with extensions, is bonded securely to your head, and you’re done! Well, that’s why they’re called quick weave hairstyles. This method offers a seamless and natural-looking finish, making it a popular choice for everything from everyday wear to special occasions.The Unmatched Benefits of Choosing a Quick Weave
The appeal of the quick weave extends far beyond its rapid application. It offers a multitude of advantages that make it a compelling choice for anyone seeking a hair transformation. One of the most significant benefits is undoubtedly the **speed and efficiency** it provides. Installing a quick weave takes about one or two hours, and this is way less time compared to other hair extensions. Furthermore, this short time is greatly beneficial because it helps maximize your day and allows you to focus on other things. For the modern woman on the go, this time-saving aspect is invaluable. Beyond speed, quick weaves are renowned for their **cost-effectiveness**. Mastering how to do a quick weave can save you time and money, especially when compared to the higher price point of sew-in weaves or other extension methods that require professional installation and longer salon visits. This makes high-quality, versatile hair accessible to a wider audience. Perhaps one of the most exciting benefits is the **styling versatility** a quick weave offers. Explore our collection of quick weave hairstyles that offer the perfect mix of versatility and style. From chic bobs and sleek ponytails to voluminous curls and vibrant color options, these looks are ideal for every occasion. Whether you're seeking elegance or boldness, you can find the perfect quick weave to elevate your look instantly! This method gives you the freedom to experiment with different hairstyles without altering your natural hair. You can try a blunt cut quick weave bob for a sophisticated short look or embrace the beauty of luscious long locks, reveling in the sheer allure of a captivating long weave, where cascading curls cascade with confident charm, whether they flow with mesmerizing straightness or tantalizing coils. From short to wavy and everything in between, these quick weave styles are a perfect solution for a fast transformation. Finally, quick weaves can also offer a degree of **protection for your natural hair**. When installed correctly with a proper protective cap, your hair is braided or molded flat underneath, shielded from daily manipulation, heat styling, and environmental stressors. This can be particularly beneficial for those trying to grow out their natural hair or give it a break from constant styling. For beginners, this method is simple and perfect, making it an excellent entry point into the world of hair extensions. Quick weaves have emerged as a trendy way to lengthen, thicken, or completely transform your natural hair.Navigating the Potential Drawbacks of Quick Weaves
While the quick weave offers numerous advantages, it's equally important to understand its potential drawbacks to ensure it's the right choice for you. As with any hair extension method, there are specific considerations that need to be addressed to avoid common mistakes and promote better hair health. The primary concern often revolves around the **potential for damage if not installed or removed correctly**. The use of bonding glue, if applied directly to natural hair or if removed improperly, can lead to hair breakage, thinning, or even bald spots. This is why the critical importance of correct installation and maintenance practices cannot be overstated. Another point to consider is **longevity**. Quick weaves, by nature, are generally designed for shorter-term wear compared to traditional sew-ins. While a sew-in can last for several months with proper care, a quick weave typically lasts anywhere from 2 to 4 weeks, depending on the quality of the installation, the products used, and your daily maintenance routine. This shorter lifespan means more frequent re-installations if you wish to maintain the style, which can accumulate costs and potential stress on your hair over time. Furthermore, **product buildup and scalp health** can become issues if the quick weave is not properly maintained. The protective cap and glue can sometimes trap moisture or styling products against the scalp, leading to itching, odor, or even fungal infections if not cleaned and aired out regularly. It's crucial to ensure your scalp remains clean and dry underneath the cap. Lastly, some individuals might experience **allergic reactions** to the bonding glue. It's always advisable to perform a patch test on a small area of skin before full application, especially if you have sensitive skin or known allergies. Learning the pros and cons of quick weaves is essential for making an informed decision that prioritizes both style and hair health.Essential Tools and Materials for Your Quick Weave Journey
Embarking on your quick weave adventure requires a specific set of tools and materials to ensure a smooth and successful installation. Having everything laid out and ready before you begin will not only save you time but also contribute to a more professional and durable finish. So, what exactly do you need to install them? First and foremost, you'll need **hair wefts**. These are the extensions themselves, and they come in various lengths, textures, and colors. You can choose between human hair or synthetic hair. Human hair offers more versatility in styling (it can be heat-styled and colored) and tends to look more natural, but it's also more expensive. Synthetic hair is more budget-friendly and holds styles well but has limitations when it comes to heat and chemical treatments. The amount of hair you'll need will depend on the desired fullness and length of your quick weave. Next, a **protective wig cap** is absolutely crucial. This cap acts as a barrier, safeguarding your natural hair from the bonding glue. Make sure to choose a cap that fits snugly but comfortably on your head. Some caps come with a built-in elastic band for extra security. The star of the show for quick weaves is the **bonding glue**. This adhesive is specifically designed for hair extensions and is used to attach the wefts to the protective cap. Look for a strong, reliable glue that dries quickly. You'll also need a **glue remover** for safe and easy removal later on. Other essential tools include a good pair of **sharp scissors** for cutting the wefts to size, a **fine-tooth comb** for parting and smoothing your natural hair, and **clips** to hold sections of hair out of the way during installation. For prepping your natural hair, you might need hair ties, hair gel or mousse for molding, and a blow dryer to ensure your hair is completely dry and flat under the cap. Lastly, consider having a **scalp protector** or a liquid cap solution to apply to your natural hair before putting on the wig cap, adding an extra layer of defense against the glue. Having these items on hand will ensure you're fully equipped for a successful quick weave application.Step-by-Step: Mastering Quick Weave Installation for Healthy Hair
Mastering the installation of a quick weave is key to achieving a flawless look and, more importantly, maintaining the health of your natural hair. While it may seem simple, the critical importance of correct installation practices cannot be overstated. A quick weave is a fast, easy way to put in a weave, but precision and care are paramount.Preparing Your Natural Hair and Scalp
The foundation of any successful quick weave lies in proper hair preparation. Begin by thoroughly washing and deep conditioning your natural hair. This ensures a clean slate, free from product buildup and excess oils. After washing, gently detangle your hair. The next crucial step is to dry your hair completely. Any residual moisture trapped under the protective cap can lead to mildew, odor, or scalp irritation. Once dry, your hair needs to be laid as flat as possible against your scalp. For longer hair, this typically involves braiding it down into small cornrows or flat twists. For shorter hair, you can mold it down using a strong holding gel or mousse, ensuring it's sleek and smooth. Some stylists also recommend applying a liquid cap or scalp protector directly to your natural hair before the wig cap for an extra layer of defense against the glue. This preparation creates a smooth, even surface for the quick weave and protects your natural strands.Applying the Protective Cap and Wefts
Once your natural hair is prepped and completely dry, it's time to apply the protective wig cap. Carefully place the cap over your head, ensuring it covers all of your natural hair and fits snugly without being too tight. You can use a bit of hairspray around the edges of the cap to help it adhere to your skin and stay in place, creating a seamless transition. Now, the fun begins: attaching the hair wefts. Start at the nape of your neck, working your way up towards the crown. Measure a weft against your head, cut it to the appropriate length, and apply a thin, even line of bonding glue along the track of the weft. It's crucial to apply the glue only to the weft, never directly to the cap or your natural hair. Press the glued weft firmly onto the protective cap, holding it in place for a few seconds to allow the glue to set. Continue this process, layering the wefts closely together to achieve a full, natural look. Overlapping the wefts slightly can help eliminate gaps and create a more voluminous finish.Bonding the Quick Weave Securely
As you lay each weft, ensure that the glue is drying properly. Some stylists use a handheld blow dryer on a cool setting to speed up the drying process and ensure a strong bond. Pay close attention to the perimeter of your quick weave, especially around your hairline and ears, to ensure a neat and secure finish. If you plan to leave out some of your natural hair (a "leave-out") for blending, make sure to section this hair off and keep it separate throughout the gluing process. Once all the wefts are glued down and the glue is completely dry, you can begin to style your new quick weave. This is where the versatility truly shines, allowing you to create anything from chic bobs to voluminous curls. By following these steps meticulously, you'll achieve a beautiful and secure quick weave while promoting better hair health and natural hair growth underneath. Remember, patience and precision during installation will pay off in the longevity and appearance of your quick weave.Maintaining Your Quick Weave: Tips for Longevity and Luster
Proper maintenance is just as important as correct installation when it comes to extending the life of your quick weave and preserving the health of your natural hair underneath. Neglecting your quick weave can lead to product buildup, tangling, and even damage to your own strands. Learn about its benefits, drawbacks, installation, and maintenance tips to ensure a positive experience. One of the most critical aspects of quick weave maintenance is your **nightly routine**. Before going to bed, gently brush your quick weave to remove any tangles. Then, loosely braid or twist your hair and wrap it with a silk or satin scarf or bonnet. This minimizes friction against your pillow, which can cause frizz, tangling, and premature wear on the extensions. Silk and satin materials are also less absorbent than cotton, helping to retain moisture in your hair. When it comes to **washing and conditioning**, quick weaves require a delicate touch. You generally shouldn't submerge your entire head in water, as this can weaken the glue bond and make it difficult for the cap to dry completely. Instead, focus on cleansing your scalp using a diluted shampoo solution or a dry shampoo. For the extensions themselves, you can gently wash them in sections, being careful not to disturb the glued wefts. Use a lightweight, moisturizing conditioner, and rinse thoroughly. Ensure the cap and your natural hair underneath dry completely to prevent mildew and odor. A hooded dryer or cool blow dryer setting can be helpful. **Product choice** is also vital. Opt for lightweight, non-greasy products that won't weigh down your quick weave or cause excessive buildup. Avoid heavy oils or leave-in conditioners directly on the glued areas, as they can break down the adhesive. For styling, use heat protectants if you're applying heat, and be mindful of the temperature settings, especially if you have synthetic hair. Regular, gentle detangling throughout the day will prevent knots and maintain the smooth appearance of your quick weave. By adhering to these maintenance tips, you can enjoy your quick weave for its maximum lifespan while keeping your natural hair healthy and protected.Safe Quick Weave Removal: Protecting Your Natural Strands
Just as critical as proper installation is the safe and gentle removal of your quick weave. Rushing this process or using incorrect methods can lead to significant damage to your natural hair, including breakage, thinning, and even scalp irritation. Learning how to remove them safely is paramount to preserving your hair's health. The key to a safe quick weave removal lies in using a **specialized bond remover**. These products are formulated to dissolve the adhesive without causing harm to your hair. Start by sectioning your quick weave and applying the bond remover directly to the areas where the glue is visible, particularly along the tracks of the wefts and around the edges of the cap. Allow the remover to sit for the recommended time as per the product instructions. This gives the solution enough time to break down the glue. You'll notice the glue becoming softer and more pliable. Once the glue has softened, begin to **gently peel the wefts away from the protective cap**. Work slowly and patiently, never pulling or tugging at the hair. If a section feels resistant, apply more remover and wait a few more minutes. As you remove the wefts, you might find some residue on the protective cap or your natural hair. Continue to apply the remover to these areas and gently rub with your fingers or a fine-tooth comb to loosen any remaining adhesive. The goal is to separate the quick weave from your head without any force. After the entire quick weave has been removed, your natural hair will likely have some glue residue and may feel a bit stiff. This is where **post-removal hair care** becomes crucial. Immediately follow up with a clarifying shampoo to thoroughly cleanse your hair and scalp, removing all traces of glue and product buildup. You may need to shampoo twice. Next, apply a deep conditioning treatment or a protein mask. Your hair has been covered and potentially under stress, so it needs extra moisture and nourishment. Allow the conditioner to sit for at least 15-30 minutes, perhaps under a steamer or heat cap, to allow for maximum penetration. Rinse thoroughly, gently detangle, and style as usual. By following these careful removal steps, you ensure that your quick weave experience ends as positively as it began, promoting better hair health and natural hair growth.Unleashing Your Style: Popular Quick Weave Hairstyles
One of the most exciting aspects of a quick weave is the incredible range of hairstyles you can achieve. Quick weave hairstyles are a must for women who want to try different hairstyles in a short span of time without spending hours on weaving. They offer the perfect mix of versatility and style, allowing you to transform your look instantly. Whether you're seeking elegance or boldness, there's a quick weave style for every occasion and personality.Short and Chic Quick Weave Bobs
For those looking to keep it short with a quick weave hairstyle, the blunt cut quick weave bob is an absolute classic. While it may seem simple, its classiness is unmatched. This style offers a sleek, sophisticated, and polished look that frames the face beautifully. Quick weave bobs can range from chin-length to shoulder-length, with variations including asymmetrical cuts, layered bobs for added volume, or even a soft, graduated bob. They are perfect for achieving a sharp, clean silhouette that exudes confidence. A short quick weave bob is not only stylish but also incredibly easy to maintain, making it ideal for a busy lifestyle.Long, Luscious, and Versatile Quick Weave Looks
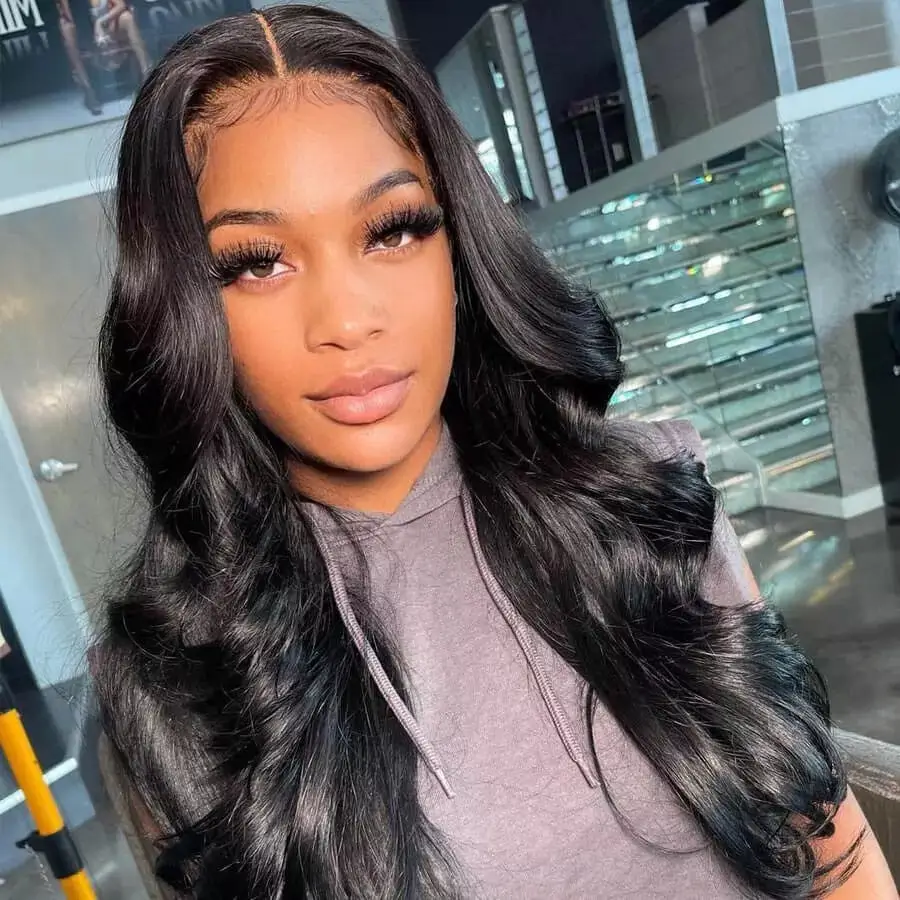
If you're dreaming of dramatic length and volume, quick weaves are perfect for creating luscious long locks. Embrace the beauty of luscious long locks and revel in the sheer allure of a captivating long weave, where cascading curls cascade with confident charm, whether they flow with mesmerizing straightness or tantalizing coils. You can opt for long, soft waves with slayed edges for a glamorous, effortless look. Straight quick weaves offer a sleek and sophisticated appeal, while voluminous curls can add dramatic flair and body. The beauty of a long quick weave is its versatility; you can wear it down, sweep it into a high ponytail, create intricate updos, or even experiment with a middle part, side part, or flip over method. These quick weave styles are a perfect solution for a fast transformation, allowing you to switch from short to wavy and everything in between.Creative Color and Texture Options
Beyond length and cut, quick weaves open up a world of vibrant color options and diverse textures. Want to try a bold new hue without coloring your natural hair? A quick weave allows you to experiment with vibrant reds, striking blues, or trendy ombré effects. You can choose hair wefts in any color imaginable, from subtle highlights to full-head transformations. In terms of texture, the possibilities are endless: from silky straight to kinky curly, body wave to deep wave, and everything in between. This means you can match your quick weave to your natural hair texture for a seamless blend or completely change your texture for a temporary new look. The ability to play with both color and texture makes quick weaves an incredibly versatile tool for personal expression, ensuring you can always find the perfect quick weave to elevate your look instantly.In conclusion, the quick weave stands as a testament to innovation in the world of hair extensions, offering a truly fast and stylish way to transform your look. From its defining characteristic as a technique involving gluing hair wefts onto a protective cap placed on your head, to its unparalleled benefits in saving time and money while providing the freedom to experiment with different hairstyles, it's clear why quick weaves have emerged as a trendy choice. We've explored the pros and cons, what you need to install them, and how to remove them safely, emphasizing the critical importance of correct installation and maintenance practices to avoid common mistakes and promote better hair health and natural hair growth.
Whether you're seeking the elegance of a blunt cut quick weave bob or the sheer allure of cascading long curls, the versatility of quick weave hairstyles offers something for every occasion. Remember, mastering how to do a quick weave can truly unlock a world of possibilities for your hair, allowing for a fast transformation without spending hours on weaving. If you've tried a quick weave or are considering one, share your experiences and favorite styles in the comments below! Your insights could help others on their hair journey. And if you found this guide helpful, don't hesitate to share it with friends and family who might also be looking for their next stunning hair transformation.

30 Quick Weave Inspirations for Seriously Stylish Girls
15 Quick Weave Hairstyles for Effortless Style

Pin by Zareyah Brewster on weaveee looks | Straight weave hairstyles
